Preparation
Environment requirement
- Operation system requirement:
- Windows
- MacOS
- Linux
- Solaris
- Language requirement: C++ 11
Install C++
Mac
There are several options for configuring a C++ development environment on MacOS:
Install Xcode:Xcode is a development environment designed for macOS that includes a C++ compiler. You can install Xcode from the App Store, and once installed, you can use command-line tools to compile and run C++ programs。
Install a standalone C++ compiler: There are a number of C++ compilers available for the Mac, including GCC and Clang, which you can download and install from the Internet.
Use a package manager: Package managers like
HomebreworMacPortsmake it easy to install open source software, including C++ compilers.
use Homebrew example:
brew install gcc
Linux
There are several options for configuring a C++ development environment on Linux:
- Install GCC: GCC is a popular C++ compiler that is installed in most Linux distributions. You can check if GCC is installed by using the following command:
g++ --version
If it is not installed, you can use the following command to install it:
sudo apt-get install build-essential # use in Debian/Ubuntu
- Installing Clang: Clang is another popular C++ compiler that can replace GCC, and you can install Clang using the following command:
sudo apt-get install clang # use in Debian/Ubuntu
- Use a package manager: Package managers like apt or yum make it easy to install software, including C++ compilers
Windows
There are several options for configuring a C++ development environment on Windows:
Install Visual Studio: Visual Studio is a development environment designed by Microsoft for Windows that includes a C++ compiler. You can download and install Visual Studio from the Microsoft website.
Install MinGW: MinGW is an open source C++ compiler for Windows. You can download and install it from the MinGW official website.
Install Cygwin: Cygwin is a Unix-like environment for Windows that includes a C++ compiler. You can download and install it from the Cygwin website
Use WSL2 (Windows Subsystem for Linux )
Install Tiger Open API C++ SDK
Linux/Mac
Install Boost
Install Boost Reference Documents
Installation Method 1:Use homebrew
brew install boost
Installation Method 2:Source Code Installation
Download the source code to any path: https://www.boost.org/users/history/version_1_81_0.md,
Take/usr/local/as an examplecd /usr/local/ wget https://boostorg.jfrog.io/artifactory/main/release/1.81.0/source/boost_1_81_0.tar.bz2Decompression:
tar --bzip2 -xf boost_1_81_0.tar.bz2Compile:
cd /usr/local/boost_1_81_0
./bootstrap.sh
./b2 headers
./b2
Compile and install cpprestsdk
cd /tmp  # select the directory where you want to store the source code
git clone https://github.com/microsoft/cpprestsdk.git
cd cpprestsdk
mkdir build
cd build
cmake -G "Unix Makefiles" -DCMAKE_BUILD_TYPE=Debug ..
make -j 8
make install
Description
CppRestSDK Reference Documents
The cpprestsdk installed directly through the package management software may not be the latest version, also may have unknown issues.
Compile and install tigerapi sdk
source code: openapi-cpp-sdk
If you are using a compiled sdk, this step can be skipped
Preparation: Adjust the path to CMakeLists.txt according to your system environment
cd YOUR SOURCE DIR- create build directory
mkdir build cd build - build
cmake -G "Unix Makefiles" -DCMAKE_BUILD_TYPE=Debug .. make -j 6 make install - install tigerapi sdk Put the header file in the header file path, eg. /usr/local/include Put the header file in the lib path, eg. /usr/local/lib/
Windows
Dependencies:Visual Stodio C++ Development Environment https://visualstudio.microsoft.com/zh-hans/ Download and install Visual Stodio Installer,Check the box "Desktop development using C++"
Compile tigerapi sdk The dll or lib in the source output is the compiled library of sdk, the project configuration can call sdk after introduction
Install IDE
We suggest you use CLion or Visual Stodio.
Registered Developer Information
Before using the OpenAPI, please apply for permission. Personal users can register as developers on the API website registered, and institutional users can access the Institutional Account Center. Please use Chrome for this page
To access the Open API, you need to Open a tiger account and Funded.
During the registration process, you will be asked to sign an API authorization agreement, Then you need to complete the developer information registration on this page, please fill in and submit your information.
You can obtain the following information upon sucessful registration:
- tigerId: A unique Developer ID assgined by the OpenAPI platform. It is used to identify a developer,you have to pass in ID to use API.
- account: Account number,you will need to pass in your account number when you are calling trade related APIs。There are 3 types of accounts: global account, standard account and paper account.
- Global Account:a string beginning with capital letter U, example:U12300123,
- Prime Account:number(5 to 10 digit), example:51230321,
- Paper Account:17 digit number,example:20191106192858300,
Only active accounts with balance will be shown on the page, if an user has both active global account and standard account, they will both be shown on the developer info page.
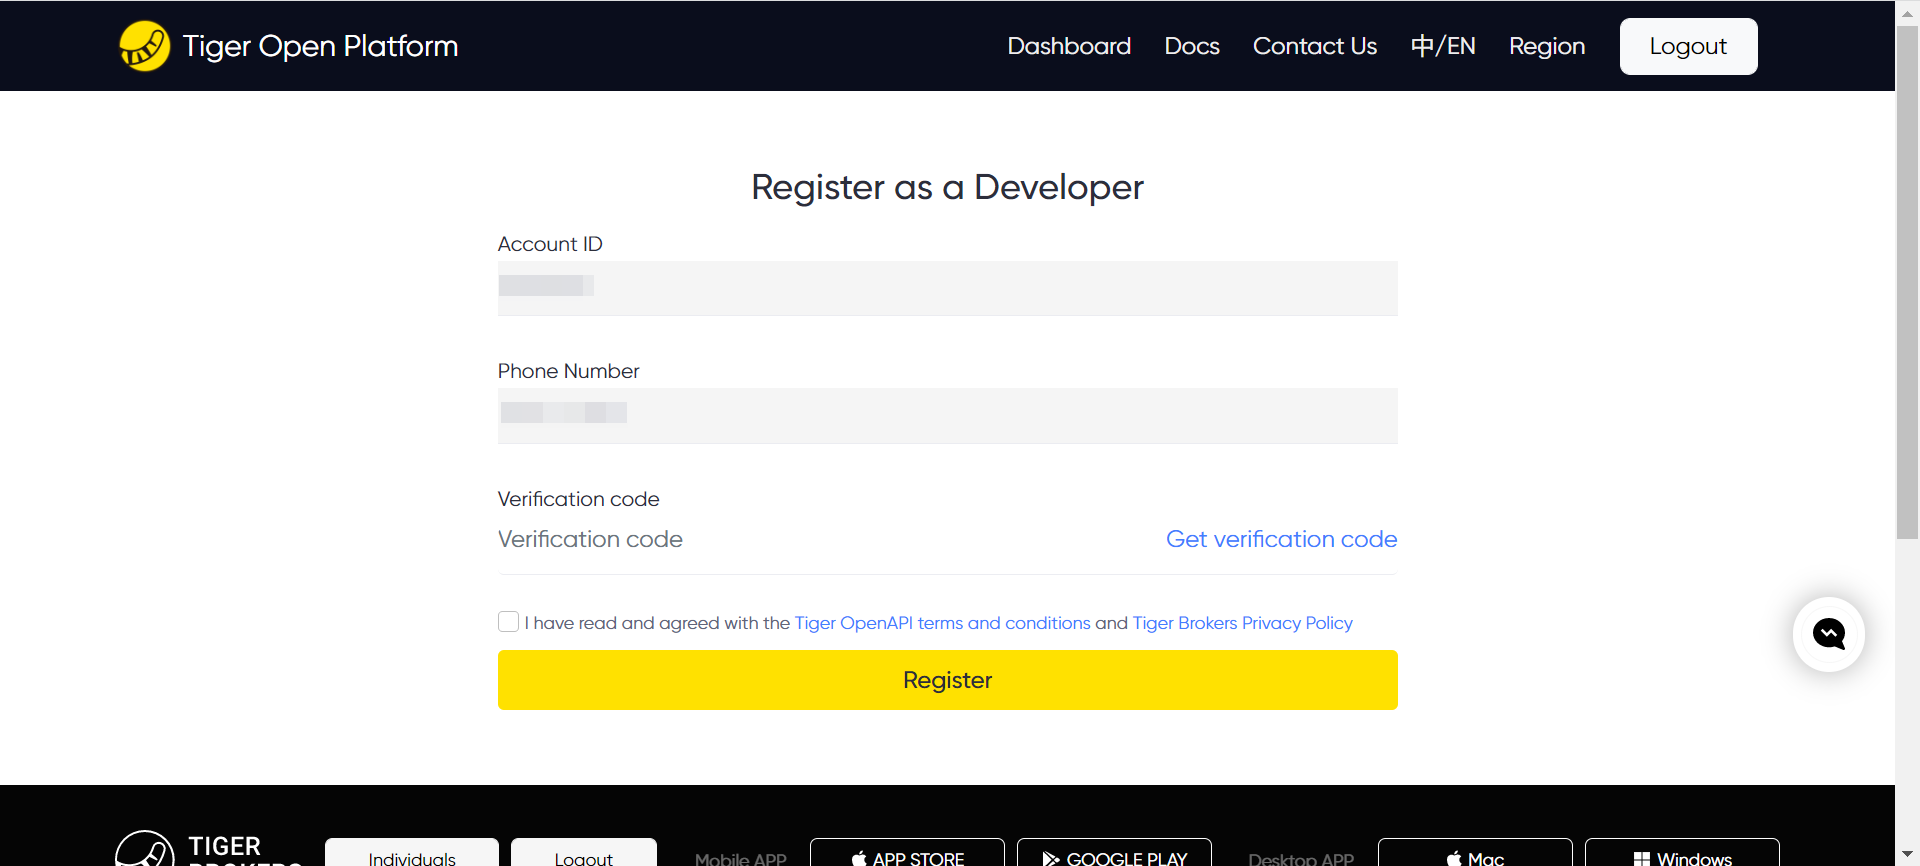
Developer Register Page: Use your phone and verifyCode to register.
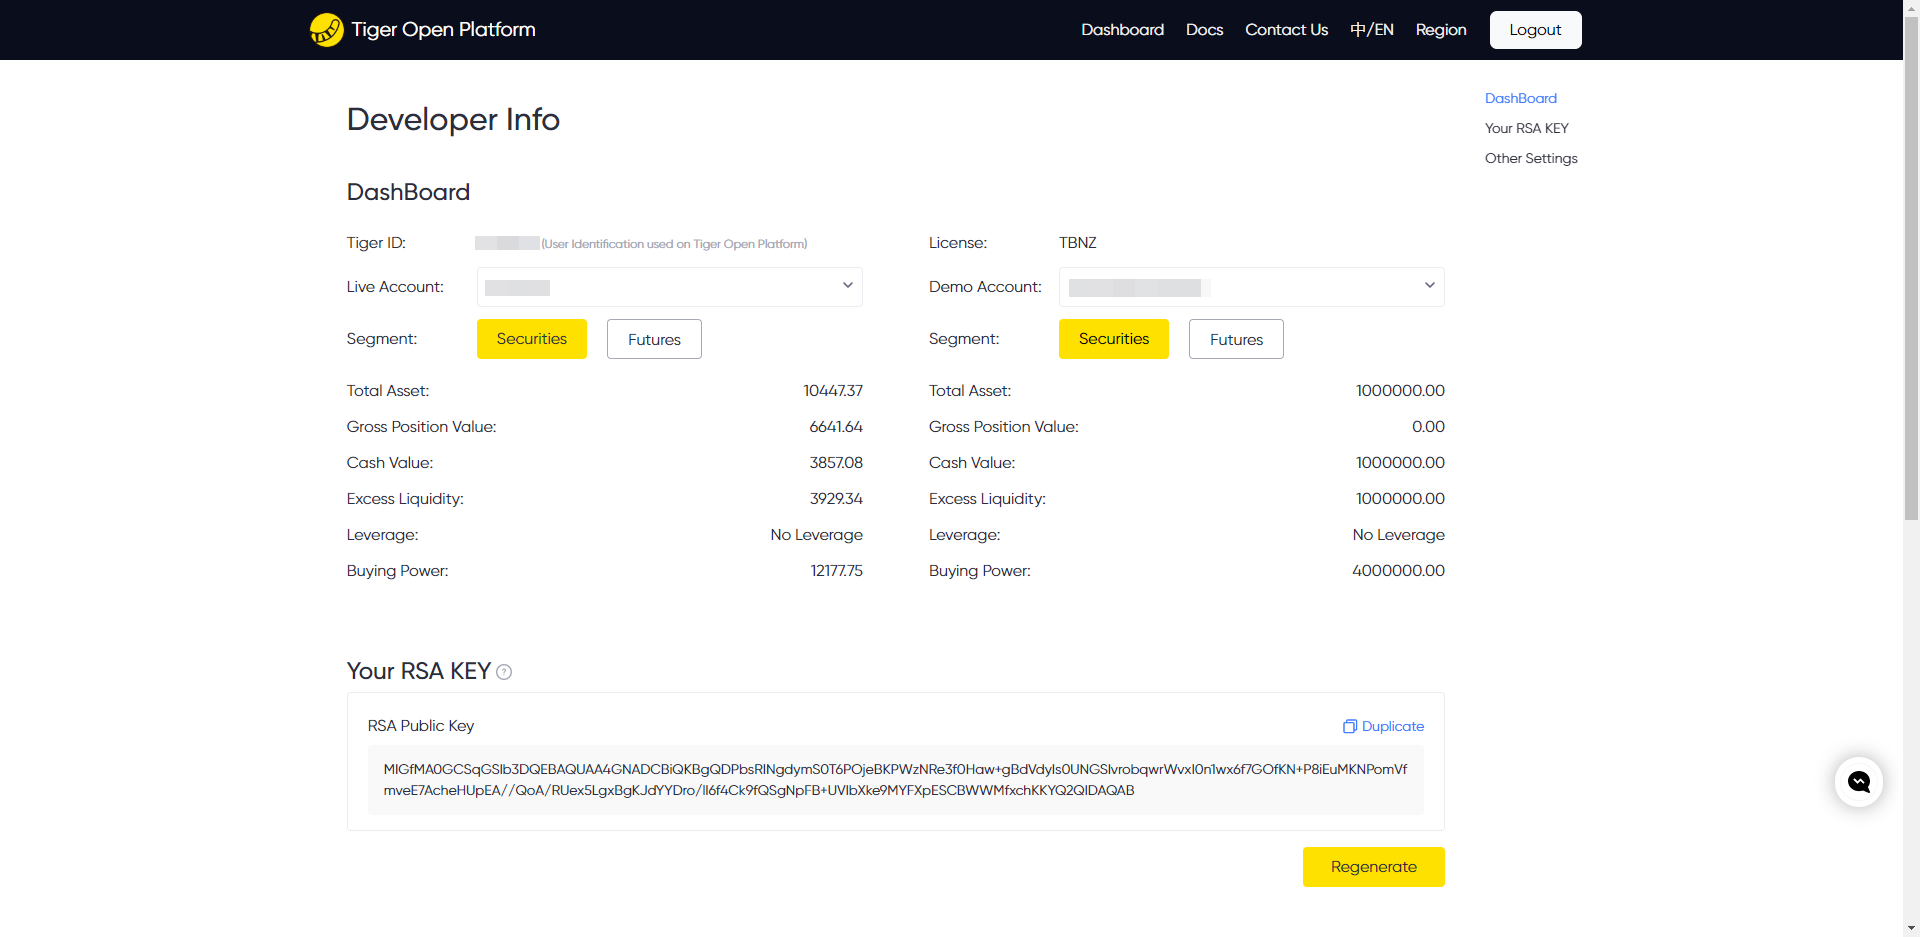
Developer Info Page: Tiger ID,Live Account,Paper Account,License Info will be used in SDK.
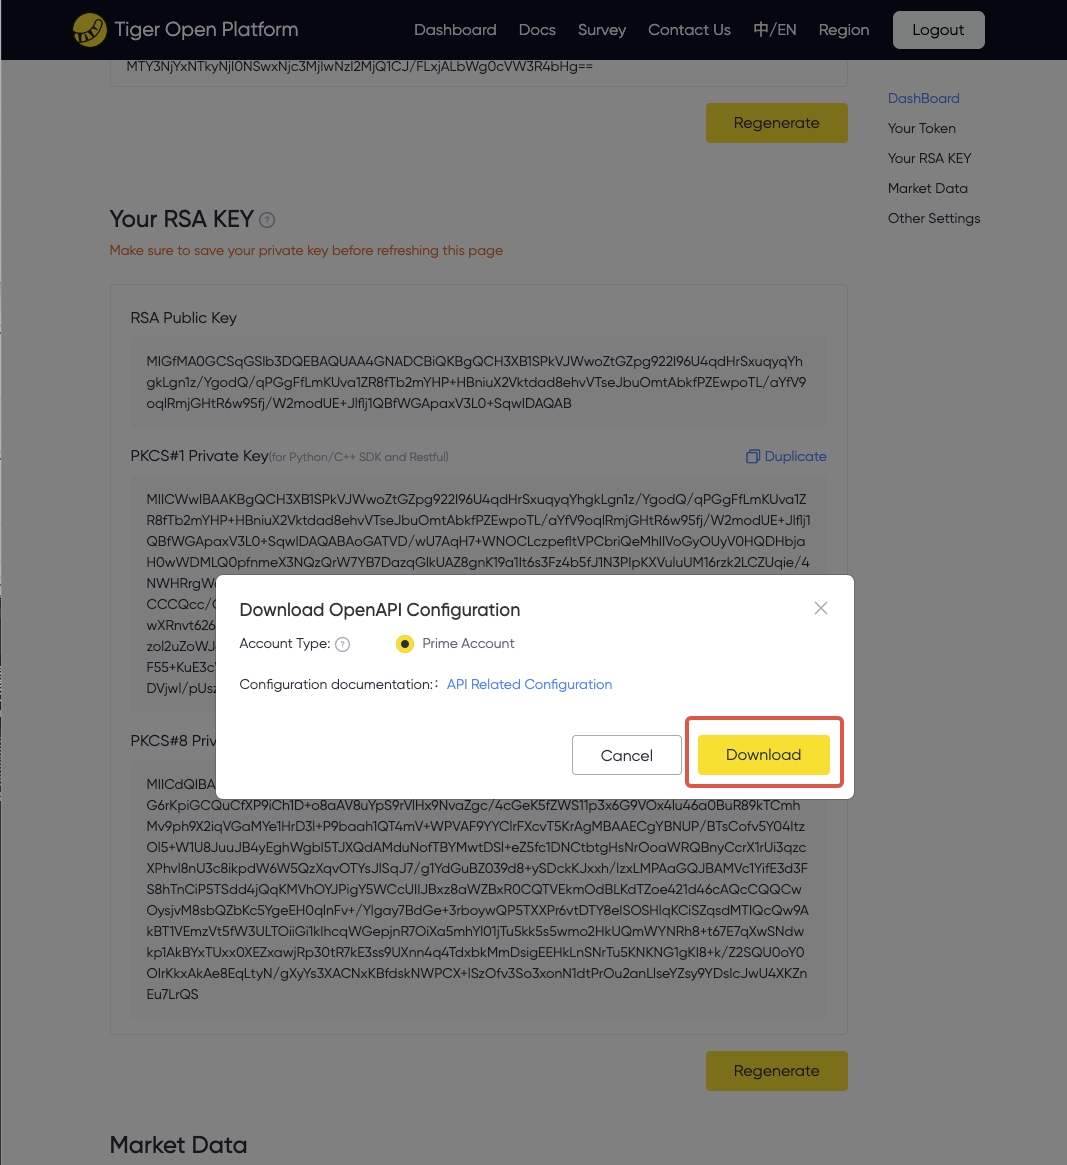
Attention:You need to keep the privateKey in the picture below locally and keep it properly to prevent leakage, please update it in time if you find leakage. The private key will not be saved on the Tiger server, users need to save it before refreshing the page. The private key will disappear automatically after the page is refreshed. If the private key is not saved, you can replace it by re-generate button.
After regeneration, download the tiger_openapi_config.properties file to the local. Copy the tiger_openapi_config.properties file to the directory configured by ClientConfig.DEFAULT_CONFIG.configFilePath.
The content format of the tiger_openapi_config.properties file is as follows. ‘account’ is the default account, which can be replaced between the prime account and the paper account.
private_key_pk1=MIICXgIBAAKBgQCodM4fM5cz+tj8SUuxxSbSMFxNHM23hftjAuXr9THweyFtTmA/mxwo9HYEhYjxCgYAJt78xbzw7aiKu+pI45O8il8ns6UL3mT59QlCKu0+FZmF2g54teyqoiol71xcM096D3ss0oJzKGt+btvlBzdcrXM6+pZqbK14ASWGE4uBEQIDAQABAoGAX5iBjFVTngzhbDIQAZ73C9qj1qLc3yPqZ+KyJbgskeLeMlCC8DWOwnMQMjqxXtAoXZexfVKdiT/lIG3JY3m6URzfYwJt5VUD9LeIcyPxuj7Eg2vxlZwJ6slT7DQ6LJCbUe1PUDlKKXYe/wEUNJ3dEJ/eFEhR8vNyFlW8DJj+az0CQQDhQwYUZIcq+9WDcSen5Sm5oS765aMAyWcOdkpokau+fZ/H9NwT0U+jaEHyswZMJBTDJ42iS8HV0MuGdtLJ7JzHAkEAv3Fq1AHHJ1Tyxtf/VWHBRfx304NFlDX87Ji7uyv1t+05ZYVT0U8Q5CUPdBA3QexMBKd1i6BXUH/xOY5aX+UrZwJBAKR7ej79wK0kQh2+TESOUs9W4KUXdNSoO3YV7fM5Gvz3Yepx4xkdZ1dcU3tSObDzT63IfeUaCCmGUnaW4QfMnBUCQQCMOsK6mrbLe7D9sBgK7bkJz73iA+UChG1IzTOuDaxGVpDVaU0VI2pHA1KHfJ1NP44LVrKGXSO4Bo+mzjwqxA3/AkEApA8roUKXtKTqC2rb8hs5AscMpHFUl7ZbVeKX14gAg9QPWxkh8BcB1dljAsrp7irEtq4VezD2Cf40b52Fcx+pvA==
private_key_pk8=MIICeAIBADANBgkqhkiG9w0BAQEFAASCAmIwggJeAgEAAoGBAKh0zh8zlzP62PxJS7HFJtIwXE0czbeF+2MC5ev1MfB7IW1OYD+bHCj0dgSFiPEKBgAm3vzFvPDtqIq76kjjk7yKXyezpQveZPn1CUIq7T4VmYXaDni17KqiKiXvXFwzT3oPeyzSgnMoa35u2+UHN1ytczr6lmpsrXgBJYYTi4ERAgMBAAECgYBfmIGMVVOeDOFsMhABnvcL2qPWotzfI+pn4rIluCyR4t4yUILwNY7CcxAyOrFe0Chdl7F9Up2JP+UgbcljebpRHN9jAm3lVQP0t4hzI/G6PsSDa/GVnAnqyVPsNDoskJtR7U9QOUopdh7/ARQ0nd0Qn94USFHy83IWVbwMmP5rPQJBAOFDBhRkhyr71YNxJ6flKbmhLvrlowDJZw52SmiRq759n8f03BPRT6NoQfKzBkwkFMMnjaJLwdXQy4Z20snsnMcCQQC/cWrUAccnVPLG1/9VYcFF/HfTg0WUNfzsmLu7K/W37TllhVPRTxDkJQ90EDdB7EwEp3WLoFdQf/E5jlpf5StnAkEApHt6Pv3ArSRCHb5MRI5Sz1bgpRd01Kg7dhXt8zka/Pdh6nHjGR1nV1xTe1I5sPNPrch95RoIKYZSdpbhB8ycFQJBAIw6wrqatst7sP2wGArtuQnPveID5QKEbUjNM64NrEZWkNVpTRUjakcDUod8nU0/jgtWsoZdI7gGj6bOPCrEDf8CQQCkDyuhQpe0pOoLatvyGzkCxwykcVSXtltV4pfXiACD1A9bGSHwFwHV2WMCyunuKsS2rhV7MPYJ/jRvnYVzH6m8
tiger_id=20150001
account=12345678
license=TBHK
env=PROD
RSA Keys
The Tiger Open API uses RSA for authentication. RSA encryption is used to secure user interface requests. The RSA bidirectional signature authentication mechanism is used to prevent interface requests from being maliciously tampered. The private key is saved locally by the user.
Attention:
- The Java private key format is different from that used by the Java SDK. The Java private key format is PKCS#8. If any problem occurs when you use the SDK, please check whether the private key is in the correct format first
Token(Optional)
The TBHK license (users of other licenses can ignore it) needs to generate a token. After the token expires, it needs to be regenerated, and download the tiger_openapi_token.properties file to the local. Copy the tiger_openapi_token.properties file to the directory configured by ClientConfig.DEFAULT_CONFIG.configFilePath.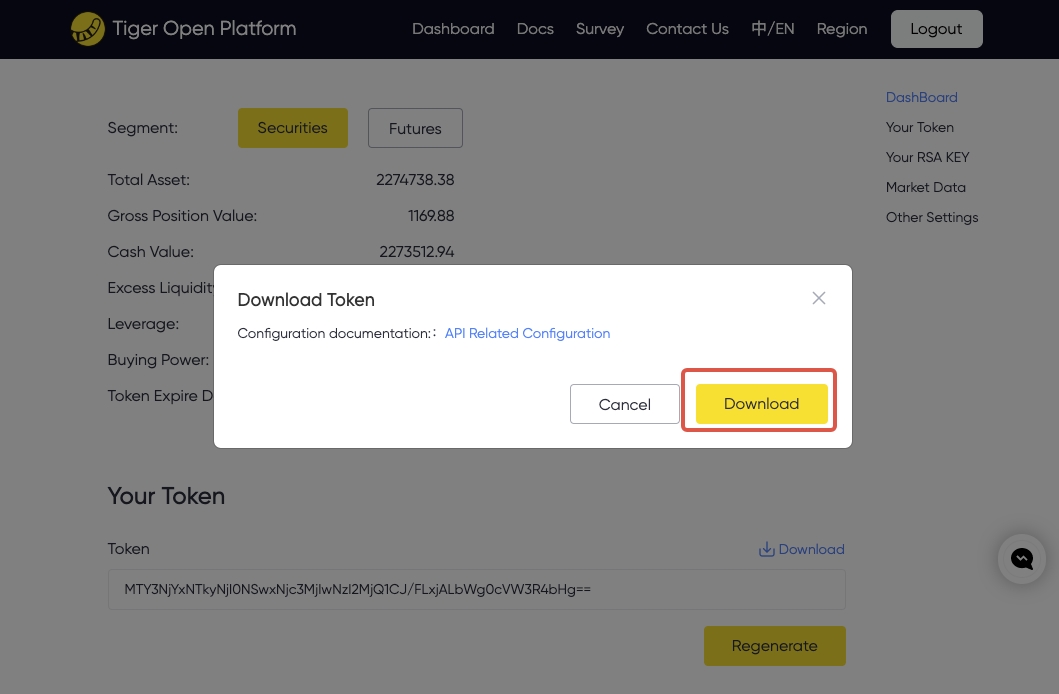 The validity period of the token is 15 days. If it expires, you need to regenerate and export a new token file on the developer information page. Before it expires, it can be refreshed by API. SDK default implementation: refresh the token every 5 days, and update the local tiger_openapi_token.properties file at the same time, Configurable automatic refresh cycle days (refreshTokenIntervalDays) and specific time (refreshTokenTime). If you need to refresh the token yourself, please configure clientConfig.isAutoRefreshToken = false.
additional configuration, optional
| Title | Required | Description |
|---|---|---|
| IP White List | No | Only IP addresses in the white list can access Tiger API,use “;” to divide multiple IPs |
| Callback URL | No | customized callback URL of users's program, used for receive the message for update on order and account status, user can also use the callback function provided in the SDK to receive callback messages |
Subscribing to Market Data (Optional)
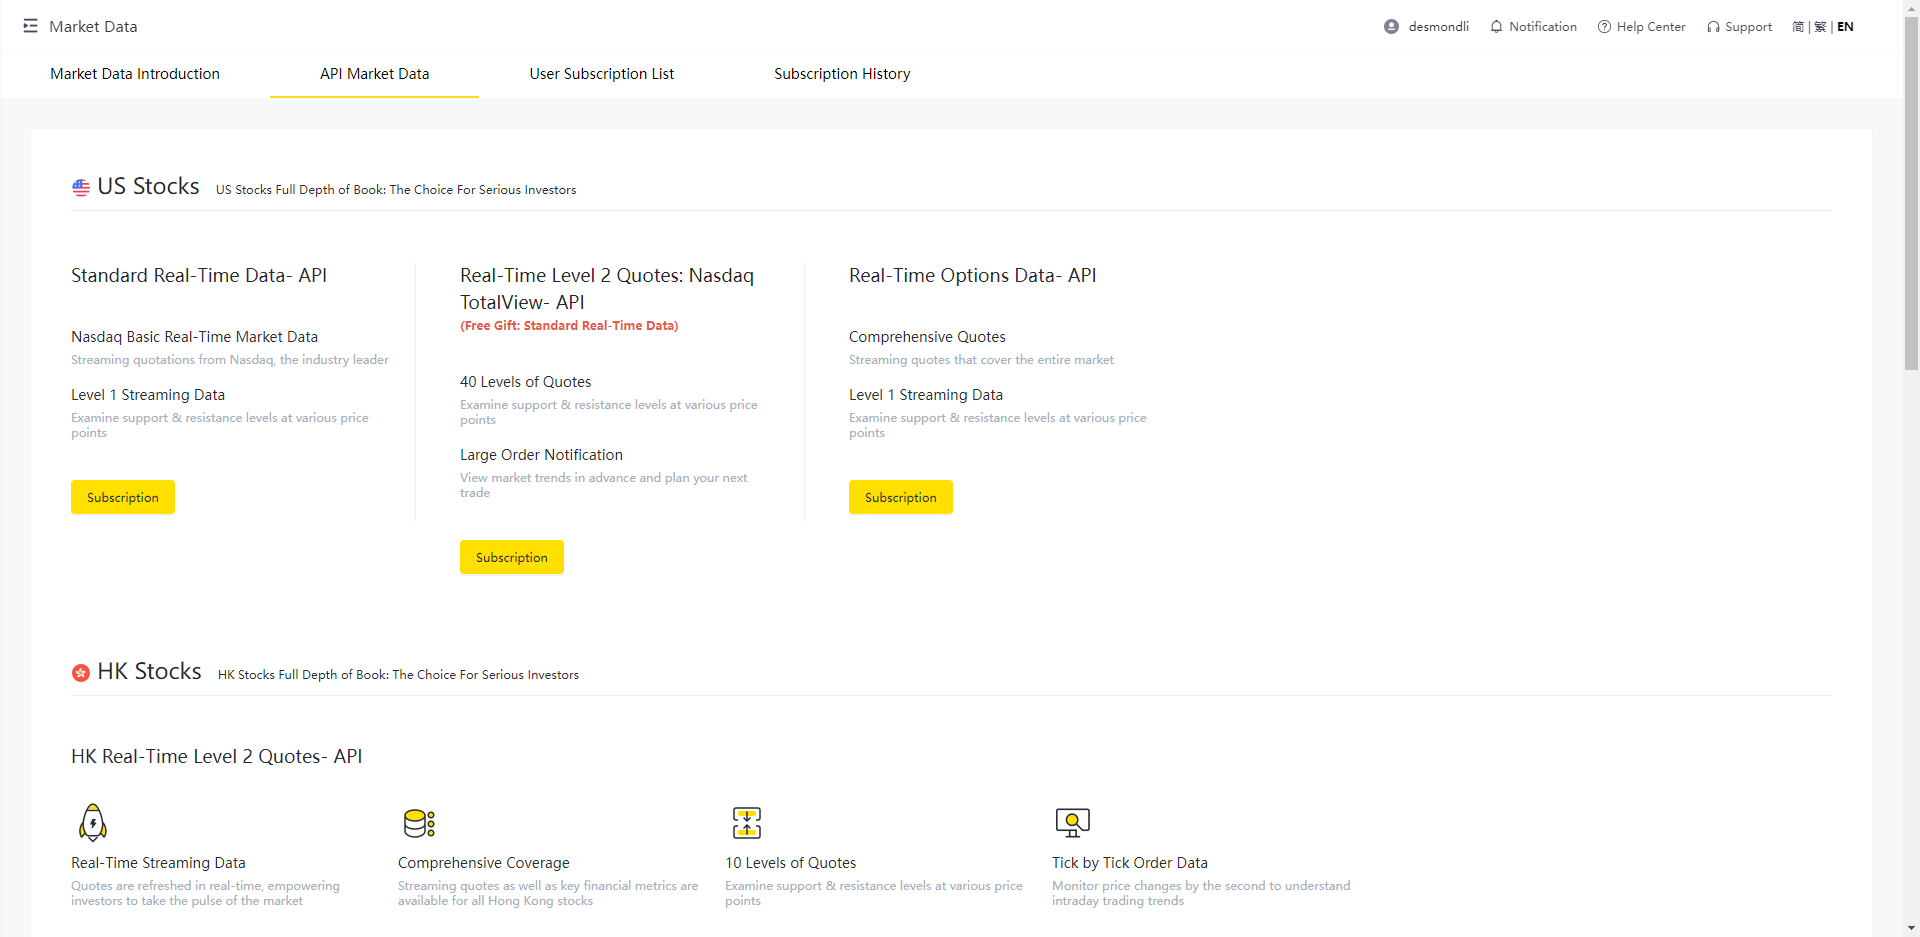
We offer our users free access to delayed market data for the U.S market. Our customers from Mainland China will also get free Level 2 Quote Subscription for HK market. Live quotes data are also available for a fee. Please note that Open API is an independent service from our APP, and API data need to be purchase seperately. Please follow the instructions below to subscribe market data for API:
Individuals
1.Login Personal Center to purchase quote.
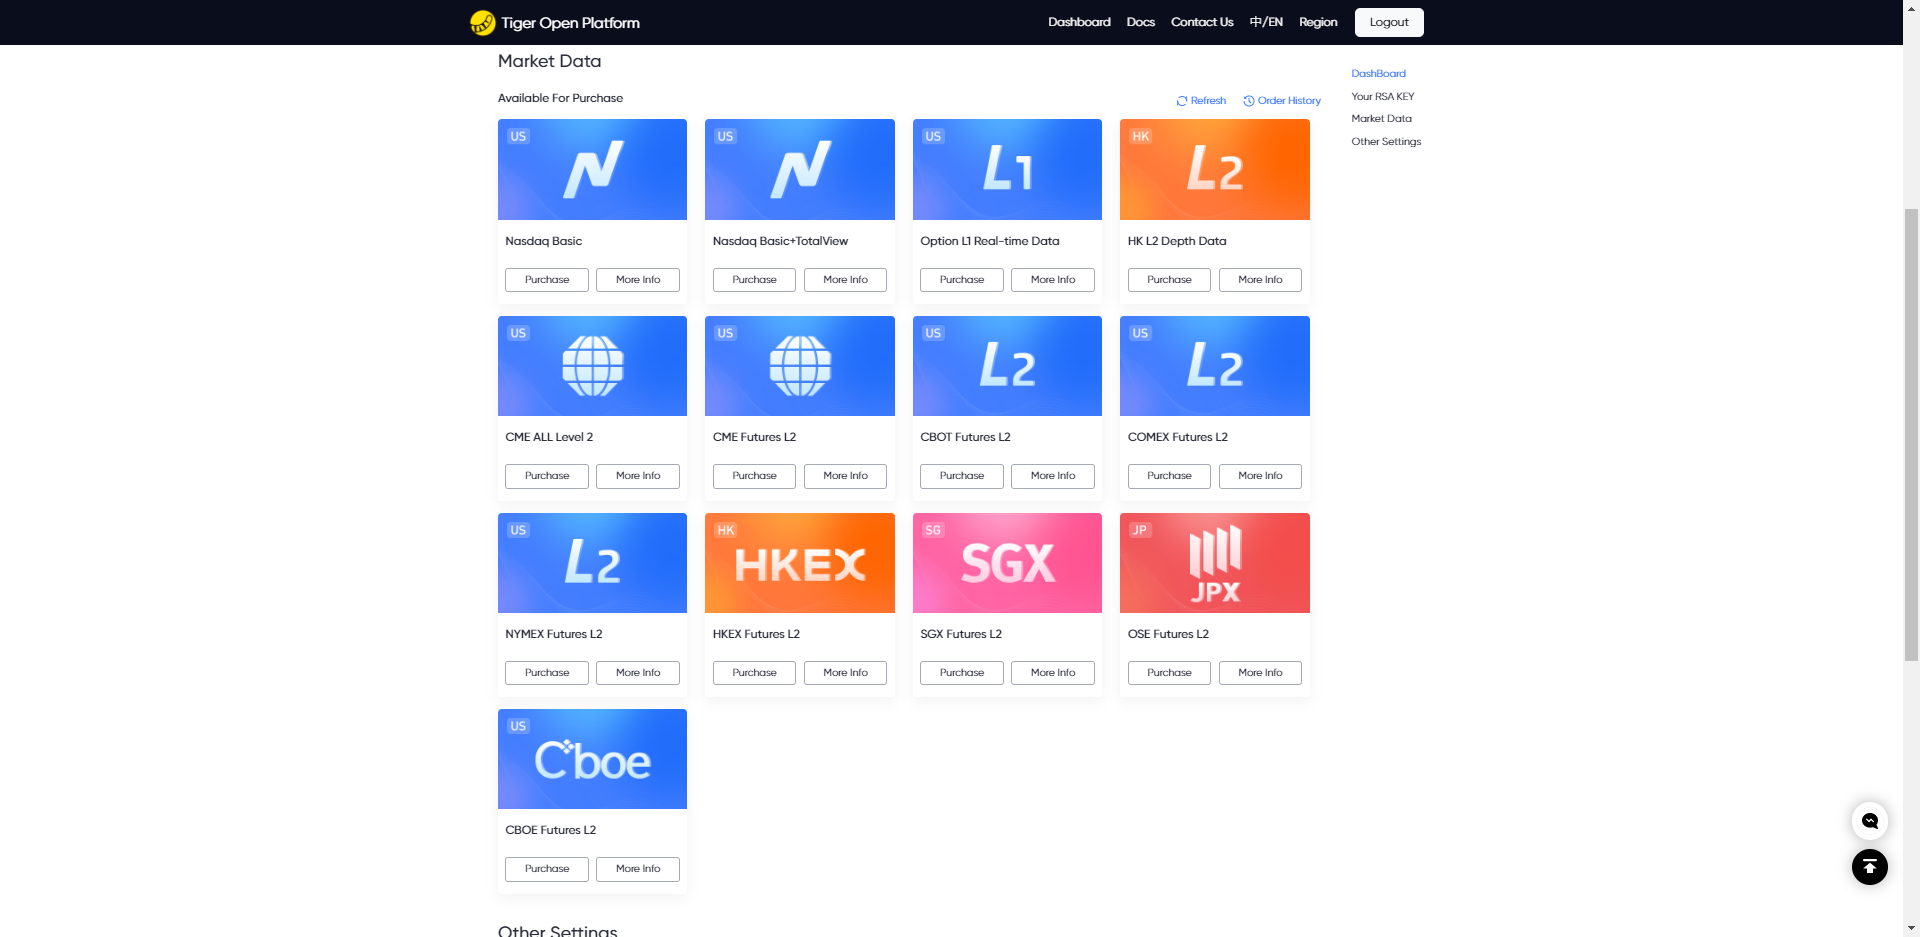
2.Go to Tiger Trade APP - Profile- Market Data Store- OpenAPI and select from the subscription list shown on this page
Institutional user
Go to Tiger Brokers Institutional Account Center - Market Data and subscribe
API Config
Before using the API, you need to complete the relevant configuration of the API interface call. Specific configuration information (including tigerId, account, license, privateKey and other configurations, the value of the tiger_openapi_config.properties file is preferred) can be found on the developer information page.
	  ClientConfig config = ClientConfig(true);

    /**
    * you can get this information from our Developer Info Page:
    * https://developer.itigerup.com/profile
    */
    config.private_key = "your private key"
                         "xxxxxx your private key xxxxxxxx"
                         "-----END RSA PRIVATE KEY-----";
    config.tiger_id = "tiger id which can be found in Developer Info Page";
    config.account = "tiger trading account id which can be found in Developer Info Page";
		config.license = "your license";

    /**
     * Use the encapsulated quotation interface QuoteClient
     */
    std::shared_ptr<QuoteClient> quote_client = std::make_shared<QuoteClient>(config);
    value result = quote_client->get_quote_permission();
    cout << result << endl;
